After quite a bit of work, all the elements are together to make the Simulator flyable in a finished state! This includes finishing the stretching of the screen, hooking up the sound, and most importantly, putting up the block out curtain. This blocks out all the light making the projector image visible. It also help keep the cool air in and the hot air out (or the other way round depending on the season).
I finally had the opportunity to sit down and have a fly for an hour or two, and it is a whole lot of fun! The instruments and screen look great! The screen is big enough to give a real feeling of immersion, and the controls feel good (though I have set up the air-brake backwards and need to swap it!)
There are still a number of things to do, but this is probably the final milestone before completion!
Welcome to the Blog for the Soarability Gliding Simulator. This Blog will give an overview of the design and build of the gliding simulator for the disabled, to be based in Cunderdin in Western Australia. This simulator will be part of a wider project to bring gliding to the disabled, and also the wider community.
Sunday, November 27, 2011
Saturday, November 19, 2011
End of a long week!
I have been working on the Simulator for all of the past week so have been able to get a lot done. All the main cladding has now been finished on the ceiling and walls. The screen has been cut and hemmed ready for mounting with some more insulation behind it. The LED lighting is up and looking good, and the sound is working.
I also took delivery of the extra ramp. This extends the length and halves the gradient on the existing ramp, meaning that a wheelchair user can get into and out of the trailer unassisted. I have demonstrated this below. I'm sure an actual wheelchair user will do it with rather more skill, but it does prove the point!
The time is getting close when I will be ready to trial the Sim by letting people have a go! Stay tuned!
Monday, October 24, 2011
Roof panels and hoist rail
The roof panels are all up and so the hoist rail can go in permanently (big thanks to my brother for the help). I'm very happy with the result. From now on it will be a lot easier putting in panels since they are on the wall.
I have also had a chance to test the LED lighting which looks great!
Sunday, October 9, 2011
Lifting Hoist and Cladding
It has been a while since my last post. Progress continues with all going well. With most of the flying aspects of the trailer being close to finished, current work involves cladding and hoist work.
The hoist mounts are now fixed into the roof structure and the hoist rail was able to be put up to test the positioning and function. The hoist sits out in the open to lift users, and can move to directly over the top of the seat and then off into the corner when not in use.
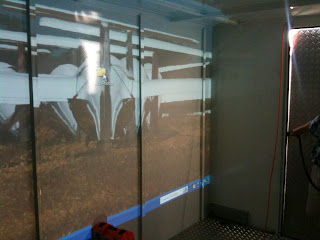
Once the hoist rail was tested, it had to come out again to allow the cladding to go up. Not the easiest job, but very necessary to keep the heat from radiating through the roof on those hot days. Plus it looks great once up, and will cut down on the ambient light in the trailer. The same will be going onto the walls and will give a much cleaner look, hiding all the cabling and structure.
I'm looking forward to seeing the finished look!
Thursday, August 4, 2011
In Other News - First SoarAbility flight
I was excited to hear that over the weekend, SoarAbility had its first flight with a disabled passenger. By all accounts it went smoothly, and will hopefully be the first of many!

Friday, July 22, 2011
First Flight!
I got to fly the simulator for the first time today, and it was a lot of fun!


There is still lots to do, but this is another milestone achieved. The screen area covers one entire wall as planned, and the instruments tie in and work beautifully. Currently it is just projecting onto the wall, hence the lines from the trailer structure. Since I am now using the proper PC rather than an old laptop, the refresh rates on both the screen and the instruments is ultra smooth.
There are some bits and pieces to sort out with respect to cabling, but that's about it. Next job: ceiling mounted hoist!
Sunday, July 17, 2011
Seating finished
The seating is now finished in the Sim. Not the most exciting post for someone wanting to read about flying, but it does mean I'm getting closer! It has underseat storage, is comfortable and looks good! Nuff said!

Sunday, July 10, 2011
Fuselage installed into Trailer
Hi Everyone
Progress has been a little slow over the past few weeks, but the Simulator has now reached a bit of a build milestone. The fuselage was mounted into the trailer over the weekend, having had all the wiring finished over the previous weeks.
Overall I am very happy with the results, with the space around the fuselage seeming much more open that it appeared on the computer screen. This just makes getting around and working on the Sim easier, and will no doubt make using it easier as well!
Sitting in the seat is quite exciting. The image will be projected over the entire wall and should look fantastic. I can't wait to get it running!


Tuesday, April 26, 2011
Instrument panel update No.2
This picture shows the instrument panel with buttons, switches and instruments in place.
The next step is to mount and wire it into the fuselage
Tuesday, March 22, 2011
Instrument panel update
Here is the instrument panel. It still needs the buttons and switches put in it, but I think it's looking rather good!
Saturday, March 19, 2011
Trailer Mods
Hi Everyone
The trailer got back yesterday, having had air conditioning and an awning fitted. This vastly improves the comfort levels whilst inside it! The awning nicely shades the door from direct sunlight, and makes for a lovely cool space inside.
I am also nearing completion of the instrument panel, which you can see in place here:
More photos when its finished.
Wednesday, February 23, 2011
Instrument panel
After much messing about with existing instrument panels, I have decided to build my own. This is because existing panels are not the right size to fit the necessary equipment behind them.
Below you can see the first bit of glass fibre coming out of the mold, and the trimmed final product ready for the instrumentation. I should have it fitted into the cockpit soon, and will post some photos then.
Monday, February 7, 2011
Quick Update
Hi All
The trailer is currently away at the moment having the air conditioning fitted. I am also fitting the fuselage out with all the necessary switches pots and screens necessary to make it run. Pictures when it's finished. Stay tuned!
Wednesday, January 12, 2011
Tuesday, January 11, 2011
Projector
Hi Everyone
Long time since the last post. Lots has been happening, but nothing blog-worthy.
The projector arrived a while ago, and I have finally found the time to quickly set it up in the trailer to check the throw. The photo below shows how the image fits almost perfectly onto the side wall. Obviously the screen isn't in yet, and the projector will eventually be mounted on the roof, which will correct the vertical alignment.
Even so, it is exciting to see the image lighting up the inside of the trailer!
Stay tuned!
Subscribe to:
Posts (Atom)